


Table of Contents
- What You'll Need Before You Clean Sterling Silver Charms
- Step-by-Step: How to Clean Sterling Silver Charms at Home
- Safe Cleaning Methods for Hand-Painted Jewelry
- Best Silver Polishing Cloth for Jewelry: How to Choose
- How to Prevent Tarnish on Sterling Silver Between Cleanings
- When to Skip DIY and See a Professional
- Conclusion
Last Updated: August 29, 2026
What You'll Need Before You Clean Sterling Silver Charms
Gathering supplies and identifying your jewelry type before cleaning determines whether you restore or damage your pieces.
Here is what to have on hand:
- Mild dish soap (fragrance-free, dye-free)
- Lukewarm water in a small bowl
- A soft-bristled toothbrush (extra-soft or baby toothbrush)
- Cotton swabs for tight crevices
- Microfiber cloth or lint-free polishing cloth
- Baking soda and aluminum foil (for the ion exchange method)
- White vinegar (optional, for light tarnish)
- Anti-tarnish strips for storage
- A clean, dry surface to work on
At Nomades Collection, we design sterling silver charms meant to be worn and cherished through years of military moves, homecomings, and milestones. That kind of wear deserves a care routine that protects every detail, including the hand-painted finishes that make each piece personal.
Solid Sterling vs. Silver-Plated: Why It Matters First
Sterling silver is a metal alloy composed of 92.5% pure silver and 7.5% other metals, usually copper. It is durable, carries a hallmark stamp of "925," and responds well to most standard cleaning methods.
Silver-plated jewelry is a base metal coated with a thin layer of silver. Abrasive methods that work safely on solid sterling will strip plating off, exposing the base metal and causing permanent damage.
How to tell the difference:
- Look for a "925" stamp, usually inside a bracelet clasp or on the back of a charm
- Check the weight: sterling silver feels noticeably heavier than plated pieces of similar size
- Inspect worn edges: plated jewelry often shows a different color at friction points
If you are unsure, treat the piece as plated and use only the gentlest method.
Step-by-Step: How to Clean Sterling Silver Charms at Home
The most effective cleaning method depends on how much tarnish you are dealing with. Light dullness responds to a simple soap wash. Heavier oxidation calls for the baking soda and aluminum foil method.
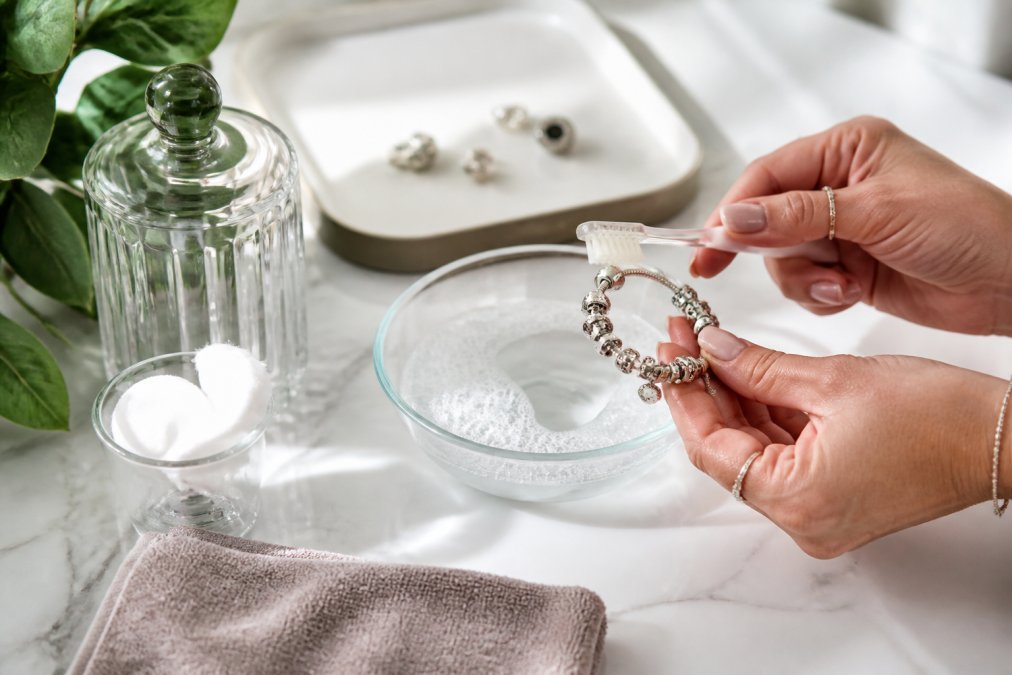
Method 1: Mild Dish Soap and Lukewarm Water
This is the right starting point for most charm bracelets. It removes everyday grime, skin oils, and light tarnish without risk to the metal or decorative finishes.
Total Time: 10-15 minutes
- Fill a small bowl with lukewarm water. Never use hot water: thermal shock can loosen stone settings and warp delicate findings.
- Add two to three drops of mild dish soap. Fragrance-free formulas are best because added chemicals can react with silver.
- Submerge the charm bracelet or pendant and let it soak for five minutes.
- Use a soft-bristled toothbrush to gently scrub each charm in small circular motions, paying attention to the back faces where tarnish accumulates fastest.
- Rinse thoroughly under cool running water, ensuring no soap residue remains in crevices.
- Pat dry immediately with a microfiber cloth. Do not air-dry: water left on sterling silver accelerates oxidation.
- Buff gently with a clean section of the microfiber cloth to restore shine.
Expected Result: The charm bracelet should look noticeably brighter, with dull finishes caused by everyday sulfur exposure clearing up significantly.
Method 2: Baking Soda and Aluminum Foil Ion Exchange
This method works through ion exchange: tarnish is silver sulfide, and aluminum foil in a baking soda solution attracts sulfur ions away from the silver, reversing the tarnish process.
Total Time: 15-20 minutes
- Line a glass bowl or baking dish with a sheet of aluminum foil, shiny side up.
- Bring water to a near-boil and pour it into the dish until it is about 2-3 cm deep.
- Add one tablespoon of baking soda per cup of water and stir until dissolved.
- Place the tarnished sterling silver pieces directly on the foil, making sure each piece contacts the aluminum.
- Leave for five to ten minutes. A faint sulfur smell indicates the reaction is working.
- Remove pieces with tongs or a spoon. Rinse thoroughly under cool water.
- Dry thoroughly with a microfiber cloth and buff to finish.
This method works well for heavily tarnished solid sterling. Do not use it on silver-plated pieces or on charms with gemstones, pearls, or enamel details.
Cleaning Tight Corners and Crevices
Charm bracelets collect grime in places a toothbrush cannot reach: inside jump rings, around bail loops, and in engraved lettering. A cotton swab dipped in soapy water handles these spots cleanly. For very tight spaces, a single strand of unwaxed dental floss pulled gently through a ring lifts residue without scratching.
Safe Cleaning Methods for Hand-Painted Jewelry
Hand-painted charms carry decorative finishes that are not sealed with industrial coatings used in mass-produced jewelry. Soaking them for longer than two to three minutes risks softening or lifting the paint. Abrasive cloths will scratch it.
The safest approach for hand-painted pieces:
- Dampen a cotton swab or the corner of a microfiber cloth with plain lukewarm water.
- Wipe the silver surfaces around the painted area gently.
- Use a dry cotton swab to clean the painted section itself, with no water or soap contact if possible.
- Pat dry immediately and completely.
Never immerse hand-painted charms. Never use white vinegar or baking soda solutions on them.
Cleaning Charms with Gemstones or Enamel
Porous stones like turquoise, opals, and pearls absorb liquids and can be permanently stained or structurally damaged by immersion in cleaning solutions. According to guidance from the Gemological Institute of America, this risk applies even to mild solutions.
For charms with gemstones:
- Use a barely damp microfiber cloth on the silver portions only
- Avoid any contact between cleaning solution and the stone
- Never use ultrasonic cleaners on pieces with set stones
- Dry immediately and completely after any cleaning
For enamel-filled charms, the enamel itself is glass-fused to metal and generally stable. The risk is at the edges where enamel meets silver: soap and water can seep under a compromised seal and lift the enamel over time. Clean around enamel carefully, rinse quickly, and dry thoroughly.
Best Silver Polishing Cloth for Jewelry: How to Choose
A polishing cloth is the single most useful tool in any jewelry care kit, and most people buy the wrong kind.
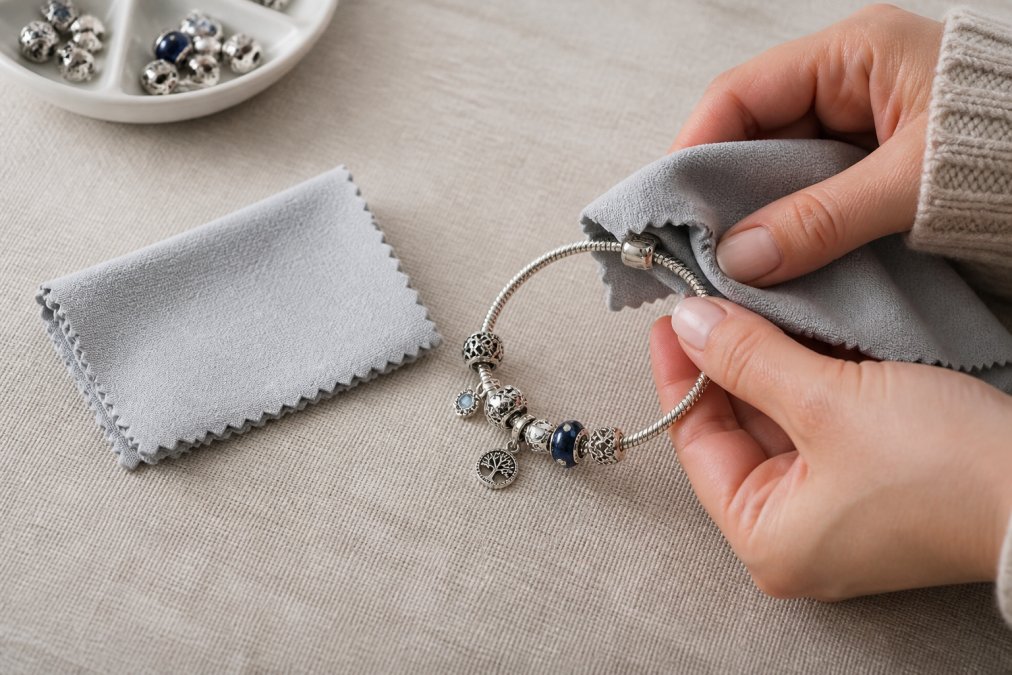
The best silver polishing cloth for jewelry is a two-layer design: an inner layer impregnated with a gentle polishing compound, and an outer microfiber layer for final buffing. The inner layer removes light tarnish and oxidation; the outer layer brings up the shine without leaving residue.
| Cloth Type | Best For | Avoid Using On |
|---|---|---|
| Two-layer impregnated cloth | Solid sterling, light tarnish removal | Hand-painted charms, gemstones |
| Plain microfiber cloth | Drying, final buffing, all jewelry types | Heavy tarnish (won't remove it) |
| Chamois leather | Final polish, solid sterling | Enamel, painted surfaces |
| Paper towels or tissues | Nothing, avoid entirely | All jewelry (too abrasive) |
When choosing, look for:
- No added bleach or harsh chemicals in the polishing compound
- Soft enough to compress around three-dimensional charm shapes
- Machine-washable design (though washing removes the impregnated compound, so keep a separate cloth for polishing vs. drying)
The dark residue on a polishing cloth after first use is the tarnish you removed. Do not wash the inner polishing layer between uses; it retains compound and continues working. Replace the cloth when it stops producing a shine improvement.
How to Prevent Tarnish on Sterling Silver Between Cleanings
Cleaning restores your jewelry. Prevention keeps it looking good between sessions. Tarnish is caused by silver reacting with sulfur compounds in the air, in skin care products, and in everyday materials like rubber bands and wool.
According to jewelry care guidance from the Jewelers of America, sterling silver tarnishes faster in humid environments, when stored near certain materials, and when exposed to chemicals in lotions, perfumes, and household cleaners.
Airtight Storage and Anti-Tarnish Strips
Airtight storage is the most effective single prevention step. Oxygen and humidity drive oxidation; remove them and tarnish slows dramatically. Store charm bracelets in a zip-lock bag with air squeezed out, or in a dedicated anti-tarnish pouch.
Anti-tarnish strips absorb sulfur compounds in the surrounding air before they can react with silver. Place one strip inside your storage container and replace it every three to six months, or when it changes color.
What to avoid in storage:
- Rubber bands directly touching silver (rubber contains sulfur)
- Cardboard boxes (off-gas acids that accelerate tarnish)
- Storing multiple pieces loose together (causes scratching)
- Bathroom storage (high humidity)
Daily Habits That Slow Oxidation
Put jewelry on last, after applying lotion, perfume, hairspray, and sunscreen. Take it off first, before washing hands, swimming, or exercising.
For charm bracelets specifically:
- Remove before any water exposure beyond a quick hand wash
- Wipe down with a dry microfiber cloth after wearing to remove skin oils and sweat
- Never sleep in sterling silver: body heat, sweat, and friction accelerate tarnish
- Keep away from chlorinated pools and hot tubs: chlorine reacts aggressively with silver
When to Skip DIY and See a Professional
Most tarnish is DIY-removable. Some situations require professional help.
See a professional jeweler when:
- Stone settings feel loose. Cleaning a charm with a loose stone risks losing it entirely.
- The tarnish does not respond to two cleaning attempts. Deep, black tarnish may require professional polishing with a rotary tool.
- The piece has sentimental or monetary value you cannot risk. Antique charms, family heirlooms, or pieces with significant gemstone value belong in professional hands.
- You notice discoloration after cleaning. Unexpected color changes may indicate that a plating layer has been removed or that the base metal is reacting.
- The hand-painted finish is lifting or cracking. This is a repair issue, not a cleaning issue.
According to consumer guidance from the American Gem Society, professional jewelry cleaning typically includes ultrasonic cleaning, steam cleaning, and a professional inspection of all settings, which is worth scheduling once a year even for pieces you clean regularly at home.
If you are hesitant about a cleaning method, that hesitation is correct. The risk of over-cleaning sterling silver is always higher than the risk of under-cleaning it.
| Situation | Recommended Action | Frequency |
|---|---|---|
| Light dullness, everyday wear | Mild dish soap and lukewarm water | Monthly |
| Heavy tarnish, solid sterling only | Baking soda and aluminum foil ion exchange | As needed |
| Hand-painted or enamel charms | Damp microfiber cloth only | After each wear |
| Charms with gemstones | Damp cloth on silver only, avoid stones | Monthly |
| Maintenance between cleanings | Dry microfiber buff, airtight storage | After each wear |
| Professional cleaning | Jeweler inspection and ultrasonic cleaning | Annually |
Last note on eco-friendly disposal: the baking soda and water solution used in the ion exchange method is non-toxic and safe to pour down the drain. Soapy rinse water is equally safe. If you use any commercial silver dip solutions, check the product label for disposal instructions, as some contain chemicals that should not enter waterways. The methods described in this guide are chosen partly because they produce no hazardous waste.
Frequently Asked Questions
What is the best way to clean silver charms?
The safest everyday method is a hand wash with mild dish soap and lukewarm water, using a soft-bristled toothbrush to reach crevices, followed by a thorough rinse and dry with a microfiber cloth. For heavier tarnish, the baking soda and aluminum foil ion exchange method works well on solid sterling silver. Always dry charms completely before storing them to prevent new oxidation from forming.
Is it safe to use a polishing cloth on hand-painted charms?
Not always. A standard silver polishing cloth is fine on plain sterling silver surfaces, but rubbing it directly over hand-painted or enamel areas can lift or scratch the finish. On painted charms, use a cotton swab lightly dampened with water to clean around the paint, and buff only the undecorated silver sections with the cloth. When in doubt, a gentle hand wash is the safest option for preserving the artwork.
What should you avoid using to clean sterling silver?
Avoid bleach, chlorine, and ammonia-based cleaners, these accelerate tarnish and can pit the metal. Toothpaste and baking soda pastes applied with heavy pressure are too abrasive for detailed or hand-painted charms. White vinegar should be used cautiously and never left in contact with the silver for long periods. Ultrasonic cleaners can loosen delicate settings and damage enamel, so skip them for charm bracelets with decorative finishes.
How often should you clean sterling silver jewelry?
A light hand wash every two to four weeks keeps most sterling silver charms looking their best with regular wear. If you wear your charm bracelet daily and live in a humid climate or work around sulfur-heavy environments, monthly cleaning is a good rhythm. Pieces worn less frequently can go longer between cleanings but should be inspected for tarnish before storage. Consistent jewelry maintenance prevents heavy buildup that requires more aggressive cleaning later.
Sterling silver charms deserve care that matches the meaning behind them. Whether you are maintaining a charm bracelet that marks a homecoming, a promotion, or a new duty station, the right cleaning routine protects both the metal and the memories it holds. Nomades Collection charms are handcrafted and hand-painted by military spouses in the USA, built to last through the kind of life military families actually live. Shop now and start building a collection worth caring for.
This article was written using GrandRanker
Leave a comment